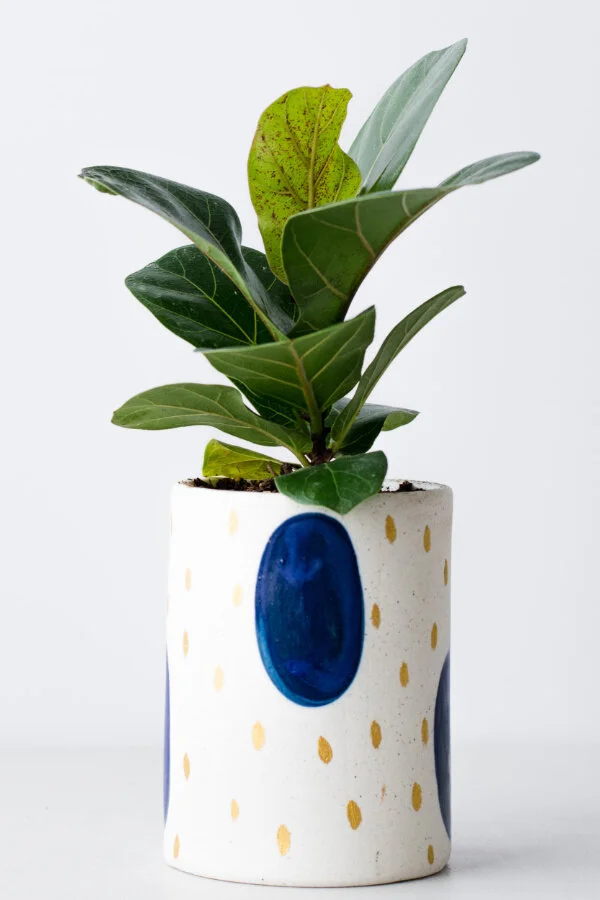
Propagating Fiddle Leaf Figs [& Why Single Leaf Propagation Only Roots Zombie Leaves]
Have you wanted to try rooting your fiddle leaf fig (Ficus lyrata) but weren’t sure about the best propagation techniques and practices?
Fear not - propagating fiddle leaf figs may seem intimidating at first, but in this post I’ll cover all the steps you need to successfully root new fiddle leaf figs of your own.
I’ll take you through best fiddle leaf fig propagation techniques and practices learned through my time spent working in university greenhouses.
I’ll also take you through why trying to root a single leaf will only ever produce “zombie leaves”
Ready? Let’s get down to learning how to divide and multiply those fiddle leafs!
This post contains affiliate links. Click here to read my full disclosure.
Here’s what we’re going to cover:
Fiddle leaf fig cutting in soil
Fiddle leaf fig cutting or leaf in water
The problem with single leaf propagation (blind cuttings/zombie leaves)
Fiddle leaf fig air layering propagation
Post-propagation transplanting
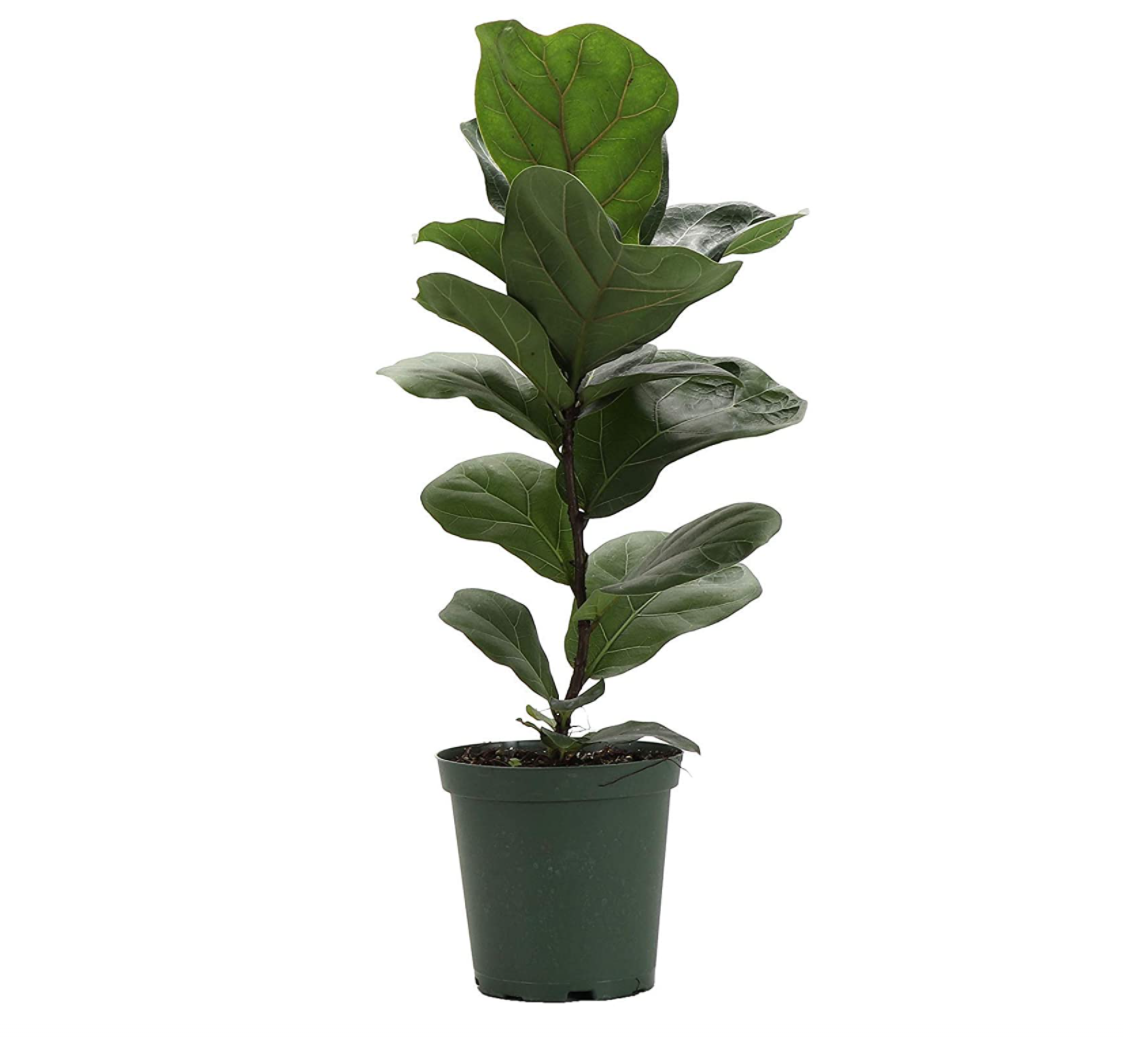
Before we get going, if you're in need of your first fiddle leaf fig so you can eventually propagate it, or you want to add it to a planter with your new rooted fiddle leaf cuttings - (I love FLFs potted in groups of three) - here are a few reasonably priced options:
SHOP THE POST
[Want more helpful plant tips and design inspo? Let's hang out on Instagram!]
Fiddle leaf fig propagation: Cuttings in soil
Plant propagation soil mix
Before we get going on the actual plant propagation part, let’s talk about propagation soil mixes.
Soil that’s suitable for plant propagation cuttings is porous, drains easily, and retains moisture. It should also be sterile, so never use garden soil or compost since it may contain diseases. (It will be much too heavy anyway without a lot of amending.)
You can buy ready made propagation mix or you can make your own. If you want to make your own, here are some propagation soil mix recipes:
1/2 perlite and 1/2 peat moss
1/2 perlite and 1/2 vermiculite
1/2 sharp sand* and 1/2 vermiculite
equal parts perlite, sharp sand* and either vermiculite or peat moss
*never use beach sand since it will contain salt
If you’re not familiar with vermiculite, it’s a type of metallic looking mica-clay that expands when super-heated, kind of like an accordion.
It’s able to hold a lot of moisture in those expanded layers without being heavy. It also has a high CEC (cation exchange capacity) which basically means it’s able to store one particular group of nutrients called cations and make them available to the plant, making it good soil amendment.
Propagation soil mix amendments: vermiculite (top) peat moss with a bit of white perlite (bottom right), and perlite (left). Photo | Greenhouse Studio
SHOP THE POST
Whatever propagation mix you use, you want to make sure it’s:
Heavy enough to hold water and support the cuttings, but light enough that it doesn’t hold as much water as a normal planting mix because the cuttings don’t have roots at first, and you don’t want them to rot.
I usually use 1/2 perlite and 1/2 peat moss mix just because I always have those soil amendments on hand.
I also like 1/2 perlite and 1/2 vermiculite, which is what we typically used as our propagation mix in the greenhouses at U.C.Davis.
Take whatever available plastic container you have on hand to mix your propagation soil. (I’ve been using an old green plastic waste basket for years.)
Roughly measure your soil amendments (for me, this just means using my trusty nursery scoop for 2-3 scoops of perlite and 2-3 scoops of peat moss, depending on how much I need.
Mix them thoroughly.
Scoop the soil into the container(s) that will hold your cuttings.
- Normally I’d say the container doesn’t need to be very deep, but for fiddle leaf fig cuttings, which tend to be larger and woodier than say, an African Violet, you might want to go with a bigger pot than you would normally use for propagation so it can support your larger cutting.
Your container can be most anything, so long as it has adequate drainage. A larger plastic yogurt or soup-takeout container with holes poked in the bottom would work well for a fiddle leaf fig cutting if you don’t have a nursery pot handy.
Taking the fiddle leaf fig cutting
Take a clean,sharp pair of pruners, clippers, or scissors. Here's a bypass pruner I like to use.
Run a cotton ball soaked in rubbing alcohol over the blades to reduce the chances of any disease transfer from plant to plant.
Making the cut - angle or straight?
Sometimes you see recommendations on whether to cut straight across or at an angle when making a cutting for propagation. Cutting at an angle increases exposed surface area. This is good and bad. Here’s the scoop:
It’s bad because it slightly increases the chance of bacterial or fungal disease entering the cutting. Therefore, it’s not the preferred cut for commercial growers where if disease took hold, it could potentially spread to much of their crop.
It’s good because an angled cutting is likely to develop more roots than a straight cut - it has more surface area to uptake rooting hormone and water.
For us home gardeners, disease is not nearly as likely to happen as it might in a wholesale greenhouse, so I recommend cutting at an angle.
Where and how much to cut from your fiddle leaf fig?
If possible, take 3 nodes from a growing point, cutting a little below the third node.
You don’t have to have 3 nodes, but 3 nodes = 3 possible growing points rather than just 1, so greater chance of success.
You can also take a longer cutting and make two or more cuttings out of it. You don’t have to use a growing point end, but it does have to have nodes.
What’s a node? Great question! A node is the point where a leaf or branch is located along a stem. This is where new buds will grow. The space in between is called the internode.
Node - internode plant anatomy demonstrated on my own fiddle leaf fig (Ficus lyrata). For plant propagation, it’s best to have about 3 nodes - it increases chances your cutting will root and grow.
The cutting will drip white milky sap. Any plant in the fig family (Moraceae) will produce a milky, white latex sap. Just don’t eat it or get it in your eyes as it can be irritating.
Dip the cutting into rooting hormone. Rooting hormone stimulates root development and speeds up the rooting process for your cuttings, so you’ll have bigger, more developed plants faster.
- Its especially recommended on woody plants like fiddle leaf figs. Ficus lyrata roots easily, but in general, woody plants are much more difficult to root compared to soft, non-woody (herbaceous) plants.
Rooting hormone speeds up the rooting process and is especially recommended for woody plants like fiddle leaf figs. Dip the stem and knock off the excess.
Fill your container with the propagation mix and water the soil thoroughly before sticking the cutting.
- This stabilizes the soil to better support the cutting and it keeps the rooting hormone from being washed off right away which might happen if you stuck the cutting and then watered it in.
“Pre-drill” your cutting holes with a pencil or chopstick. It helps prevent tissue damage and knocking off the rooting hormone when you insert the cutting.
My 50% perlite, 50% peat propagation mix. I watered the soil and “pre-drilled” the hole before sticking the cutting so tissue isn’t damaged and rooting hormone isn’t washed off.
Remove the bottom leaves - cut them rather than strip them so you don’t damage the surface tissue (cambium) which could allow disease to penetrate.
If leaves are left on sitting in the soil, they will probably rot which makes the entire cutting more likely to rot.
Cuttings should be placed deeply enough in the container so they won’t fall over - about 1 /3 of the way up should do it.
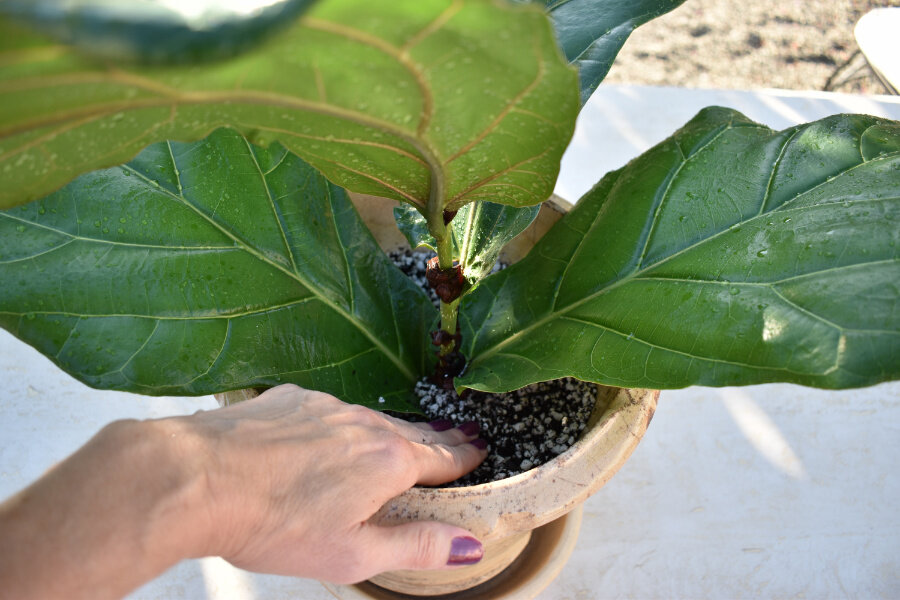
“Tuck in” the soil around the cutting to stabilize it. I used a large cutting but it still didn’t need a stake since the soil was moist and I compacted it.
The propagation mix is already wet and the hole formed before sticking the cutting. Now I compact the soil with my hands to make sure the cutting is stable.
Caring for your fiddle leaf fig cuttings
What NOT to do with your cutting
When I made my large cutting, I really wanted to keep all of it’s beautiful leaves. Cutting leaves in half to reduce moisture loss is often standard in commercial production, but I was hoping to get away without doing that.
I might have been able to but I also neglected to cover my cutting with clear plastic and mist regularly. (What was I thinking?!) Two weeks later and I was in trouble - ficus wasn’t happy with me - the stem and leaves were looking shriveled and droopy!
I thought I was going to have to turn in my plant-parent badge, so in desperation, I lopped a couple of leaves in 1/2, misted like crazy, and covered it in plastic. I’m happy to report I turned things around and it’s fine now - rooted with 2 new leaves that appeared in 5 weeks. Phew!
Fiddle leaf fig stem cutting the day it was propagated. Leaves are hydrated, dark green, and upright.
The same fiddle leaf cutting 14 days later. Note the drooping, pale leaves and stem.
Fiddle leaf fig cutting best practices
Place a clear plastic bag over the top of the cuttings and mist your Ficus lyrata leaves daily to keep them moist. Use sticks to hold the plastic up off the leaves if it seems like they’re staying too wet.
Cuttings don’t have roots, so the moisture they lose through their leaves (transpiration) is hard to replace since they can’t uptake water right now.
Don’t keep the soil too wet. Again, the cuttings don’t have roots to uptake water, so they could rot if kept soaking wet.
Keep your cuttings in bright, indirect light.
If it seems like your cuttings still aren’t hydrated enough, cut leaves in 1/2 cross-wise to reduce moisture loss through transpiration. This often standard procedure for commercial propagation.
Rooting should happen in about 4 - 6 weeks. Look for new growth on the buds located at the nodes. You can very gently tug the cutting to feel for roots too.
My fiddle leaf fig stem cutting covered in plastic, misted regularly and soil kept moist as I desperately tried to revive it. I kept it indoors near a bright window.
My fiddle leaf fig stem cutting exactly 6 weeks after propagation - rooted with two new leaves.
Fiddle leaf fig propagation: Leaf or cutting in water
Another propagation method popular for fiddle leaf figs is putting a cutting or single leaf in water. Lots of people have great success with this method, and it’s fun because you can see the rooting progress instead of having to wait to see growth or tug on the cutting. Plus they look pretty in the glass container.
I’ll admit though, it’s not my preferred method for propagating fiddle leaf figs or any other indoor plant.
When I do anything, I like to stack the odds in my favor. So when considering how to best propagate, I research methods used by commercial growers, and no growers use the water method.
It makes sense though if you think about it. Ficus lyrata isn’t an aquatic plant, therefore, water propagation isn’t going to be it’s ideal growing condition. Clearly though, it can grow very well in water since most who try it are successful.
For best results, use a cutting with about 3 nodes like discussed above rather than a single leaf. (See below for an explanation on why single leaves aren’t a good option.)
Put the cutting in fresh water in indirect light. Change the water every few days to maintain the oxygen levels.
Here’s where I break down with this method. I usually forget. The water looks the same in the glass vs. an un-watered plant pot that looks dry and feels light as a feather.
Plants need oxygen, which is why they’re better off in soil than water. Water has some oxygen, but when it sits still, the oxygen dissipates off the surface. (This is why aquariums need a bubbler - to maintain oxygen levels in the water.)
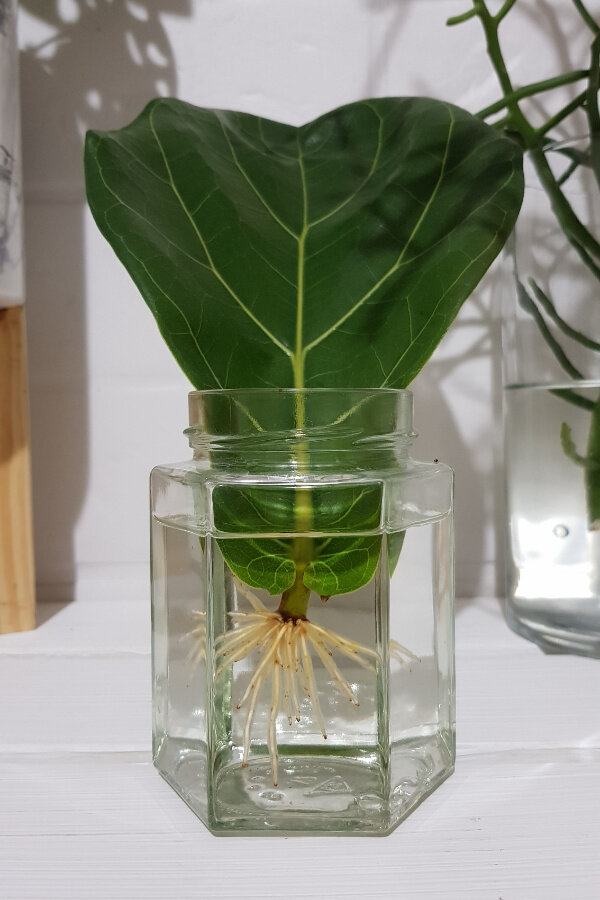
Wait and watch for roots to grow - my leaf took over 6 weeks to root. (See results in the next section.)
Avoid single leaf “blind cuttings” a.k.a. “zombie leaves”
If you’re like me, you’ve probably seen lots of pictures of fiddle leaves nicely growing roots in a glass of water. They look quite pretty, but the problem is they almost never grow anything beyond the roots (meaning no branches or leaves).
I’d heard of “zombie leaves” before, specifically with regard to Hoya kerrii - the Hoya or Wax Flower plant with the charming heart shaped leaves. They’re often sold in tiny pots with a cute, single heart-leaf, particularly around Valentines day.
The problem is, neither that single rooted fiddle leaf nor the hoya will EVER grow into a plant!
The reason is because neither the leaf nor the petiole (the stem-like part that connects a leaf to a stem/branch) has any buds (nodes) to grow new stems, branches, or leaves.
This is called a blind cutting. Your leaf can live for years with out ever growing or changing, a sort of horticultural living dead, which is where the term zombie leaf comes from.
If it ever does produce a stem, it will only be because a small part of a bud was torn off when the leaf was removed and it eventually managed to develop a bud. It can take many years and it probably won’t happen anyway.
A rooted single fiddle leaf. It won’t grow into a plant because single leaves lack lateral buds for growing new stems and leaves. The only way it could is if part of a bud tore off with the leaf, but it would take years to develop if ever.
So even though I had serious suspicions about the pointlessness of a single leaf (in water or soil) this is what I tried.
I had one large cutting off the top of my fiddle leaf that I wanted to keep whole rather than chopping it into smaller cuttings, so I removed 1 leaf off the bottom of the plant and put it in a glass. I changed the water maybe 1x/week to maintain the oxygen levels.
After 7 weeks, it has a small amount of roots. The leaf is looking pretty darn yellow and unhealthy though. Not impressive results. Even though it’s beginning to root, it’s getting a one-way ticket to the compost bin since it won’t branch and grow into a plant.
Single fiddle leaf the day I placed it in water. I changed the water about 1x/week to keep up the oxygen levels. I also put a bit of rooting hormone in the first glass of water.
7 weeks later - barely starting to root and the leaf is dying. It won’t grow into a plant because it lacks a lateral bud (node), so it earned a one-way ticket to the compost bin.
Watch the video below to see how I propagated my own fiddle leaf fig using the cutting in soil and leaf in water methods.
Fiddle leaf fig propagation: air layering
There’s one more method for fiddle leaf fig propagation that home gardeners can try called air layering. Air layering is not as easy as the other methods, requiring more finesse and technique.
Air layering is when you make incisions around the outer tissue of a branch rather than removing the branch entirely. The incisions are dusted with rooting hormone packed with moist peat moss, and wrapped in plastic and secured to prevent moisture loss.
It’s then left for several weeks until enough roots have formed that the branch can be cut from the mother plant and replanted in it’s own container, and remain stable and upright on it’s own.
Air layering - sphagnum moss is wetted and wrapped around a branch incision dusted in rooting hormone then sealed in plastic. It remains attached to the mother plant until rooted.
The main reason for using air layering is to produce a large cutting to eventually re-pot. It’s difficult to keep a large cutting upright and to keep the extra foliage hydrated when the cutting has no roots. So instead it’s rooted on the mother plant until it has enough roots to stand and grow on it’s own.
BTW - notching is a technique similar to air layering used on fiddle leaf figs to create branching without pruning plant material. Try it if you don’t want to reduce the height of your fiddle leaf but still want branching, but know it’s a lot trickier to get results. Frankly, you’re better off pruning to get branching.
Air layering an edible fig tree (Ficus) using moist coconut fiber plastic-wrapped and bound around the incision). Source | Shutterstock
Fiddle leaf fig post-propagation transplanting & re-potting
After your fiddle leaf figs have developed some roots, it’s time to re-pot them! It may be tempting just to leave them indefinitely, (we all get busy) but if they become too pot-bound in a small propagation container, they may not branch as well. So it’s best to get them into their new home.
Soil
If you want, you can just add more peat to your propagation mix so it holds more water. Otherwise use fresh potting mix.
Planter
Get a medium-sized container (around 1 gallon works). Don’t make it too large because this increases the chance of it getting over-watered.
If using a larger container from the get-go like I did (see video) be sure to hold back on your water a bit more than you normally would. (Read about choosing the right container size and shape for your plant.) Although, since fiddle leaf figs can root in water, this might not be so crucial as with other plants.
Put some soil in the bottom along with mesh or a broken piece of pottery to prevent roots from blocking drainage if you want. Do not put gravel in the bottom. (I’m overdue to write a post explaining why this harms rather than helps drainage.)
Then hold the cutting straight and centered in the pot. Fill the container with soil around the cutting taking care not to damage the new roots. Normally you’d want to transplant so the crown is slightly above the soil level to prevent crown rot, but since it’s a cutting without many roots to stabilize, I plant the stem slightly lower.
Similarly to before, keep the soil moist but not too wet, and misting the foliage is certainly not a bad idea either. The roots are still developing and need to be cared for as such.
A small fiddle leaf fig tree. Source | Lauren Mancke on Unsplash
There you have it - how to propagate your fiddle leaf figs. Before you know it, you might need to read about how to prune it to make it branch!
Enjoy watching your new little fiddle leaf cutting grow into a beautiful tree!
[Want more helpful plant tips and design inspo? Let's hang out on Instagram!]
Don’t forget to sign up below for your free design guide on how to bring the outdoors in to create a nature-inspired home you love!
Other posts you’ll love:
Monstera Deliciosa Care Guide + Design Tips
How To Repot A Fiddle Leaf Fig
How to branch Fiddle Leaf Fig into trees (step by step guide)
How to care for Air Plants (Tillandsia watering, fertilizing, & troubleshooting)
DIY Vine Trellis for Climbing Indoor Plants
Home Office Reveal - Plants, Light, & Nature-Inspired Workspace
Was this fiddle leaf post helpful? Pin it for later!
If you have any questions or comments, please drop me a note below. Be sure to check back for my response (I always respond) since no notification is sent.
XO,
Tina

